It’s been said by IT professionals around the world that there are two kinds of people – those who have experienced a hard drive failure and those who will. Unfortunately, we surely all know at least one person who’s lost data in a catastrophic failure.
Personally, I’m a believer in the 3-2-1 backup strategy which has been expanded upon greatly by Richard Anderson in his article aimed at digital photographers.
Put simply, for every file you intend to preserve you must have three copies of that file, on two different forms of media, at least 1 of which is stored (securely) off-site. This protects the data (and your reputation) not just against hard drive crashes, but other disasters as well.
So, this begs the question, how are you backing up you data? If you’re reading this article, my guess is that you may already be wondering if you’re doing everything you can to protect your information. Don’t worry, I wont judge. If we’re going to be honest, I haven’t followed this backup strategy 100% until just recently. After all, it only takes just one near miss…
I received a rather frantic email recently from a client on this very subject. It was he who’d had this near miss when one of his hard drives failed; he nearly lost years of work. Unfortunately, a few files were corrupted on the drive and he wanted to know if I still had them.
Sure! Granted, the project was from 2004, but my data retention policies are such that I keep everything. More on that another time…
Anyways, I fired up one of my many offline storage drives, uploaded the files to FTP, and washed my hands of the task. However, days later, the age of my backup drives began to weigh on my conscience. After all, the data had been sitting there for quite some time, and what if the failure had occurred not to a client but to me? Then the data wouldn’t have been salvageable!
I decided to take a long, hard look at my data backup process. To clarify, this isn’t to be mistaken for how I backup my primary system drives, though I’m certain some of these changes will trickle down to that as well. Rather, this is strictly how I backup my non-system drives which contain all my online and offline sessions (You are recording to a non-system drive, right?). One of these days I’ll talk about system drive backups if anyone is really all that interested.
The Process
Essentially, I like to think through backups as a series of options. To achieve two local and one remote backup there are any number of solutions we can use. It’s all about weighing the pros and cons of each with regard to your individual needs. So, we’ll take a look at the various technologies available for backups. However, one thing to keep in mind when you’re actually shopping for drives, no matter the technology employed, is the platters employed within. The life expectancy of a drive is related to its MTBF or mean time before failure. However, the MTBF is just that – a mean – which represents the average failure rate for the entire population of drives tested.

This value is generally high, but it does tell you something about the likelihood that your drive will fail. There is no way to tell exactly how long a drive will last but if you’re shopping for drives taking a look at the enclosed platters’ MTBF data is a great idea. Now, on to the options!
Single Drives
A single hard drive is a great storage solution for its capacity (which is constantly expanding by the day). That is of course until it fails which is why it’s important to have 2 copies of your data backed up. If you only have a small studio, two single drives are not a bad backup at all.
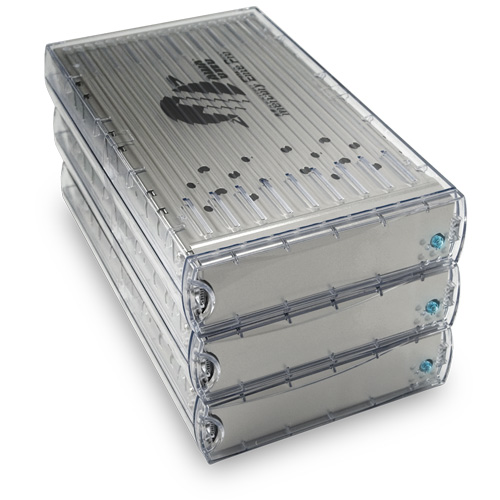
However, even if you use another backup method, singular hard drives make a wonderful working or “online” drive. If you’re the type to build your own drive, I can’t recommend highly enough the Hitachi Ultrastar series of discs, but any enterprise-class disc is a safe bet. My personal choices for pre-made enclosures are the Other World Computing Mercury and Mercury Elite’s.
Computer Attached Multi-Disc Enclosures
Once you’ve outgrown a single disc solution, you know you’ve accumulated a lot of data! You could seemingly add another single disc to your workflow which is what I’ve been doing up until now. My tipping point was 6 single drives which made finding files rather convoluted.
A much better alternative is stepping up to a multi-disc enclosure. These often have the added benefit of expandability along with the data hoarders best friend, RAID technology. An acronym for Redundant Array of Independent Disks, a RAID array is a serious step up from a single platter.

It’s a technology that provides increased storage functions and reliability through redundancy which is achieved by combining multiple disk components into a single cohesive unit, where data is distributed across the drives in one of several ways called “RAID levels”.
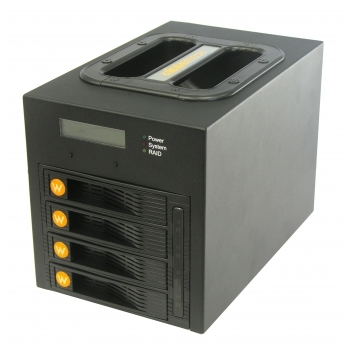
There are numerous great (albeit pricy) units on the market today, some of my favorites being the Wiebtech RTX400-QR (at right) and any of the numerous options from Other World Computing. Having a RAID array is a perfect way to achieve two local copies of data, especially due to RAID technology’s ability to rebuild the array after a failure. You’ll notice I called these devices “computer attached.” So, what if you wanted a massive RAID backup bout wanted to place it on your network? Enter the NAS!
Network Attached Storage
If your studio workflow contains a multitude of computers and you want to backup all your projects to a singular location, a NAS is quite a solution. Depending on its configuration, it can function as either a RAID or (sorry, it’s acronym time again) as a large singular drive which is called JBOD or “Just a Bunch of Drives.”

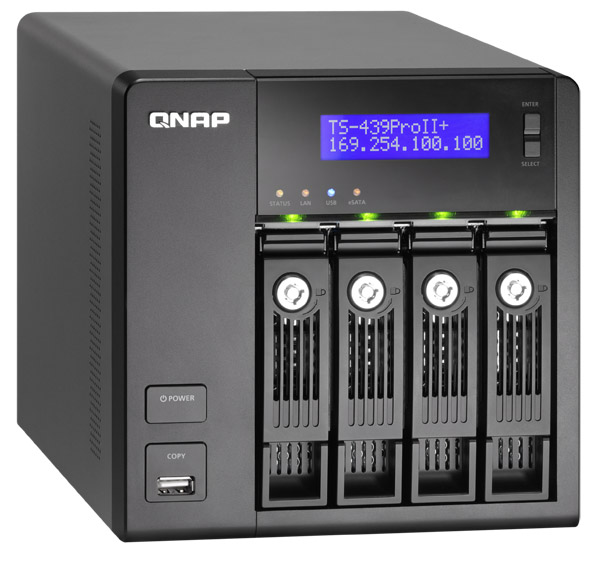
Depending upon your needs and the configuration of the NAS, projects can potentially be retrieved remotely with the proper credentials. My favorite candidate in this category has recently become the line by Qnap, one which I’m slated to deploy for a client in the coming month.
Welcome To The Cloud
When it comes to off-site backups, that’s when many people begin to falter. After all, it’s one thing to purchase a whiz-bang RAID enclosure and back everything up, but when you start talking about finding another place for your data to live which isn’t in your studio, that’s when things get a bit tricky.
Unless you’re going to constantly image your backup and rotate it offsite (I’ve received this suggestion by corporate IT folk), it’s likely you’re going to be looking at some form of storage “in the cloud“. Cloud storage has become extremely popular in the pat year although many will tell you it comes with risks. They’re correct, although it’s worth remembering that “cloud storage” is just another way of saying your information is stored in a large data center, some of which have serious backup plans of their own. They’re worthy of consideration.

One of my favorite options for online storage is Dropbox, which offers a modest amount of free space and paid plan beyond that. Another great cloud storage option is Jungle Disk. While I’ve never tried it, the features are quite solid, especially given the price. If you’re looking for a secure cloud server but don’t need something quite within the range of military grade, it’s worth considering.
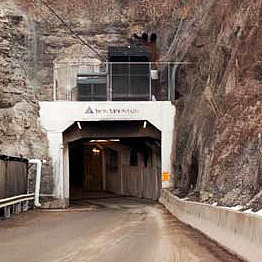
While Dropbox and Jungle Disk are worthy backup options, what about the truly paranoid among us (myself included) when it comes to remote storage? Thankfully, there’s always at least one option out there which goes the extra mile; for critical backups I’m excited about the availability of Iron Mountain’s subterranean data bunker.
While seemingly extreme, if your data is mission critical (and you know it is), there’s a great deal of comfort in knowing your backups are safe offsite in a highly secure underground facility, and mirrored to a second data center for full fail-over redundancy while your data remains encrypted in transport and storage.
The Verdict
You may be wondering, having heard these options, exact what solution I settled upon. It was quite a struggle, but I decided the best option for me was a computer attached RAID coupled with a single disc for online work, and a third copy of my data mirrored in Iron Mountain. Why, you might ask? I decided that having a physically attached RAID was the best option as i only mix on one or tow computers.
Also, I feel the singular drive is necessary as I don’t want to run the risk of corrupting my backup by working from it on a daily basis. I’ll admit that Iron Mountain is a bit of a splurge when it comes to data archival, however, I decided it’s hard to put a price on knowing that there’s always another copy of everything I need, fully RAID’ed and geographically separated, so I know it’s safe. Basically, if I lose something, it means there’s been a catastrophic event so terrible that the data has probably become irrelevant. And frankly, I’m ok with those odds.
I’m certain that someone out there has noticed I skipped over a few backup options. For instance, DVD backup. Personally, I don’t find it convenient to burn a backup of every session twice, and then make amendments to that backup if I work on it again. Plus, a suitable offsite storage location is still required. I know safety deposit boxes are popular, but while this backup methodology is perfectly valid and reliable for smaller quantities of data, I don’t feel it’s worthwhile to entertain when dealing in terabytes.
No matter the route, whether it’s a few single hard drives coupled with Dropbox or an in-studio server farm which makes my storage upgrade look minuscule at best, I hope you’ve found these options insightful. After all, few experiences are more painful than data loss, and I hope when you’re greeted with the heart-wrenching clicking of an armature that you know everything is safe and sound on another drive.
Happy archiving!